

Light Painting Tips and Techniques from a Pro Night Photographer
Posted by Matt Hill on Oct 6th 2021
-
Light Painting: Using a light source to illuminate a subject (person, landscape, objects, etc.). Light painting’s purpose is to define the shape, color and texture of something that did not otherwise have light.
-
Light Writing: Pointing a light source at the lens of a camera. The purpose of light writing is to create artful shapes and color
-
A tripod and a camera (mirrorless, DSLR or high-end smartphone)
-
A self-timer, intervalometer or wireless trigger for your camera (you can also have a friend trigger the shutter while you paint)
- One or more portable light sources (such as at the PavoTube II 6C)
- Compose
- Focus
-
Set your camera to RAW or best quality JPG
- Urban/suburban well-lit: ISO 100, f/8, 30 - 60 seconds
- Rural/wilderness on a full moon: ISO 800 f/5.6, 30 seconds
- Quarter Moon, no other lights: ISO 800, f/4, 30 - 60 seconds
- No Moon, no other lights: ISO 6400, f/2.8 30 seconds
- DO NOT light paint from behind the camera (the lighting is ugly and flat!)
- DO light from the side to bring out detail
- DO block the light source from hitting the lens, using a ball cap, black foam core, or your body
- DO wear dark clothing
- DO make one slow pass and check your work on the camera.
- Note how long you had the light on, and how far away from your subject you were
- A higher or lower angle
- Dimmer or brighter intensity
- Warmer or cooler color temperature
- A different hue
-
Try not to swing the light around in the same place, it is cumulative and can blow out the highlights.
-
If you do the above, try mixing hues or color temperatures to see what happens.
-
Start simple with your shapes to build muscle and spatial memory. Try repeating a shape you like a handful of times to master it.
-
Try comparing the difference between the crispy effect of a direct light source with a softer, diffuse light source.
-
Using a panel with many LEDs in it can create some really nifty effects.
-
Try using the FX built into your lights to see what changing hues and color temperatures does as you move the light source.
- A Guide to Getting Started With the Art of Light Painting — Part I — National Parks at Night
- A Guide to Getting Started With the Art of Light Painting — Part II — National Parks at Night
- Staying Invisible While Light Painting—The Art of not Being Seen
- The Right Angle: Creating Texture and Shape When Light Painting
- Advanced Light Painting: Balancing Ambient and Added Light to Achieve Your Objective
- To Contrast or Complement: How to Use Color in Light Painting — National Parks at Night
- Going Gradual: A Guide to Low-level Landscape Lighting
You’ve seen the photos… time-bending long exposures with gorgeous light and possibly swooping swooshes of light in the air. But how do you make these photos?
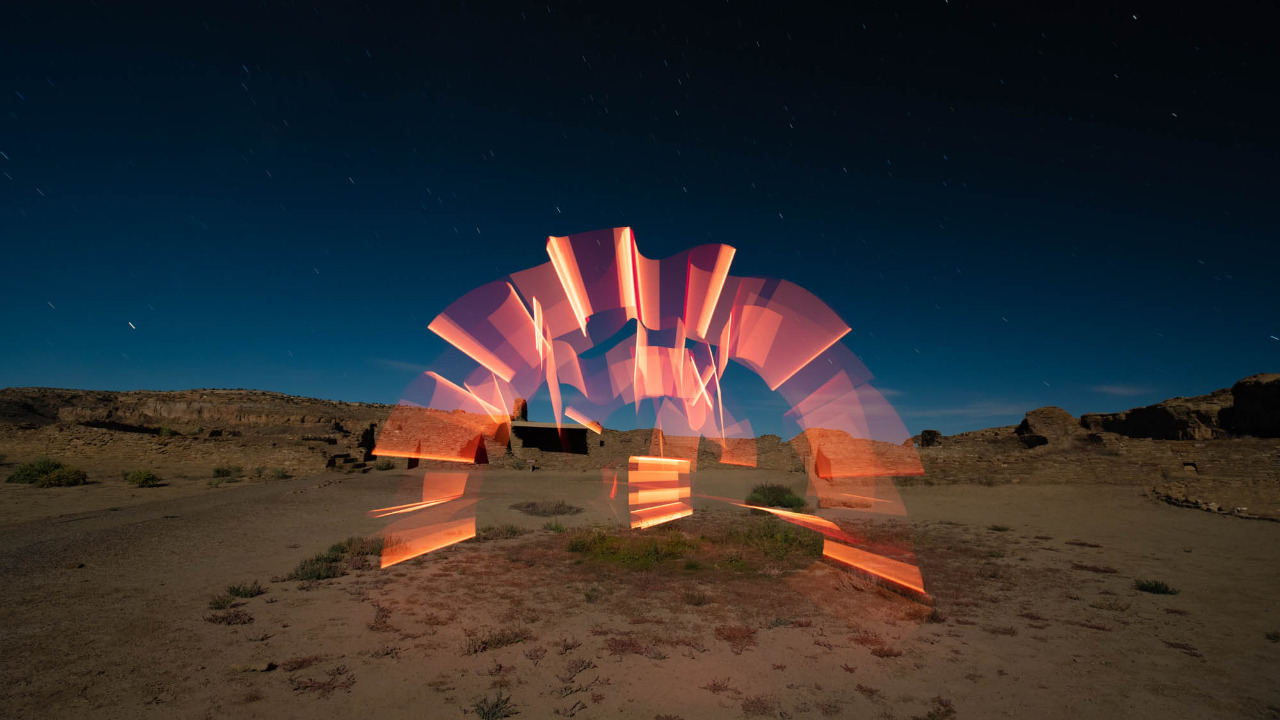
You’re in the right place! Here's a primer on...
How to get started light painting
First, let’s establish some vocabulary. Here are definitions that me and my colleagues use, for clarity:
It’s important to make these distinctions because many people use “light painting” interchangeably for lights pointed both away and towards your lens. It gets confusing, so I am careful to describe them separately. Onwards!
Second, you’ll need a few essential items to perform light painting photos:
Third, let’s prepare our gear:
Fourth, let’s establish a base exposure.
You want an exposure that is long enough to perform your lighting, but not so long it overexposes your frame. That’s a deep topic. I provided some links at the end of this post to help you figure it out.
For now, here are some easy places to start based on location and lighting:
A good exposure is one that, when you observe the histogram, does not clip the highlights. It’s also nice to not clip the shadows, and you can control that with how long the shutter is open.
LIGHT PAINTING
For light painting, your f/stop and ISO are the main contributors to a good exposure. You need to find a combo that helps you keep the highlights without clipping (hitting the right edges of your histogram).
OK, so now it’s time to light-paint a subject. Pick something you want to make most important in your frame (meaning it will be the brightest thing in the frame).
TIPS
When reviewing the result, ask yourself, did the angle and intensity make the subject look how I envisioned it? If not, what can I change to make the happen?

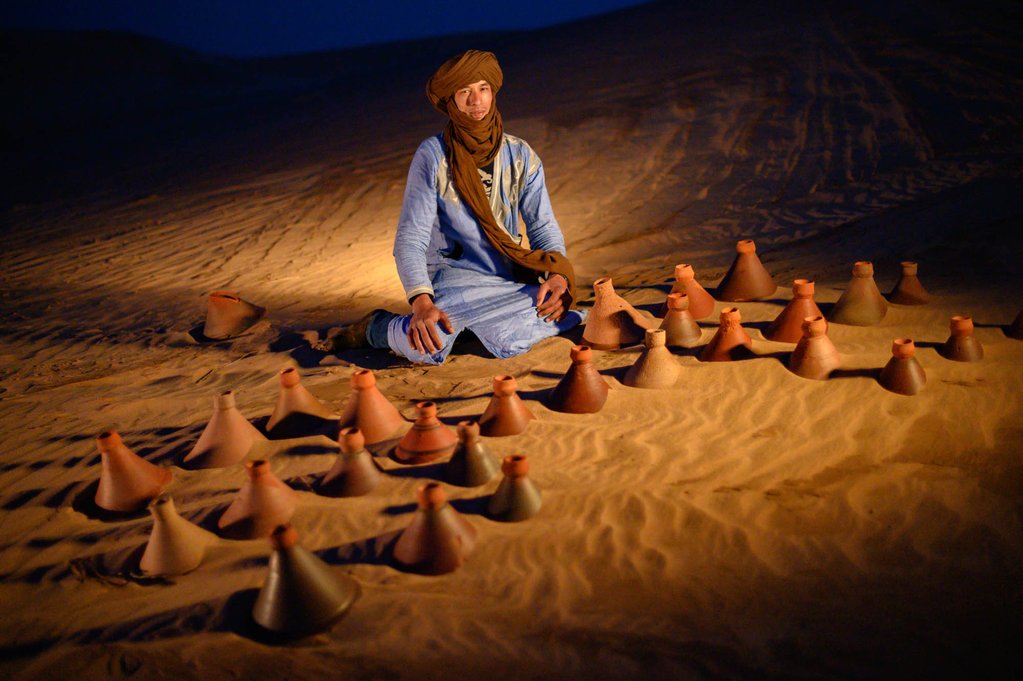
A Nanlite PavoTube 15C being used to illuminate the dunes
You may choose:
The important thing to establish is being consistent with your technique, being aware of where you are, how long you do it, and the angles.
You may also consider placing the light in a fixed position and setting it to a very dim setting. This is a fairly common technique in astro landscape photography called Low-level Landscape Lighting (LLL). Think of it as a dripping faucet that eventually fills up a bucket over a long period of time.
Once you get one angle right, you may consider painting more angles. Go for it! Draw out that detail. Make some shadows. Experiment. You can always combine the best parts of light painting in a layered Photoshop document by masking in the details that work (and masking out the rest).
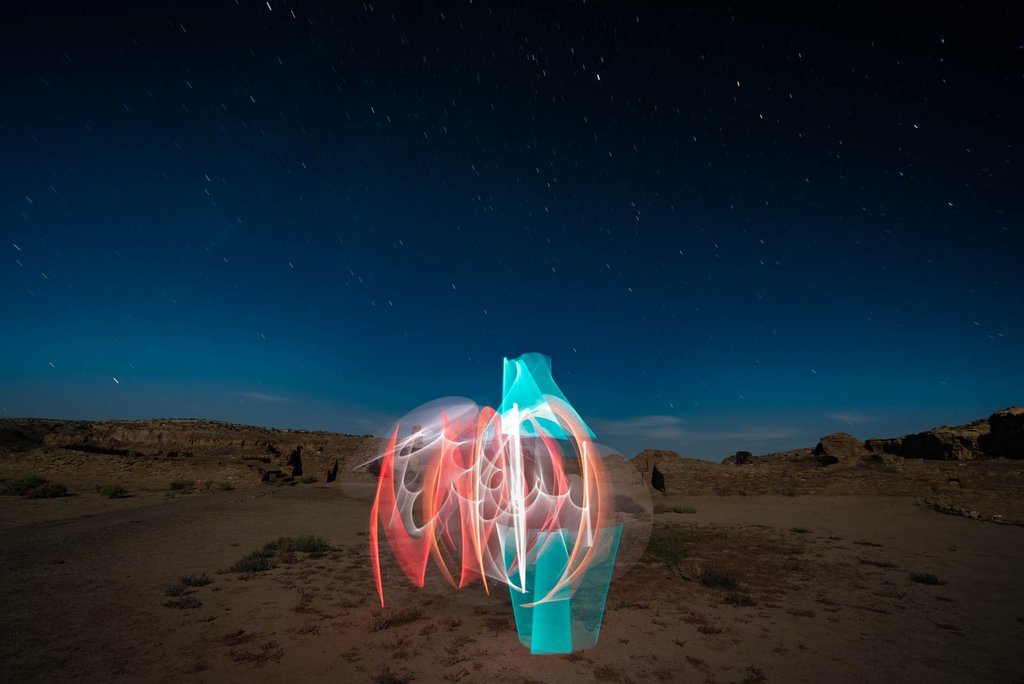
LIGHT WRITING
As with light painting, your f/stop and ISO are the main contributors to a good exposure. You also need to find a combo that helps you keep the highlights without clipping (hitting the right edges of your histogram).
But the big, big difference here is that you will likely be stopping down you lens to a smaller aperture since the light is facing your lens.
It’s very likely that you will be turning down your light to its very lowest brightness, so I strongly suggest you start there. If you don’t, you will lose important color information, especially when light writing.
The smaller aperture means longer exposures. Many cameras can perform exposures longer than 30 seconds without an intervalometer (yay!). For instance, I can leave my Nikon Z 6II open for 900 seconds without plugging in my Phottix Aion (at which point I have to use the Bulb setting).
Why smaller apertures? Well, even at 1% many LEDs are still pretty darn bright. And as I mentioned, you want the highlights in your exposure, not blown out to featureless white nothingness.

So, experiment with you light’s power setting, a low ISO (like 100), and long exposure times. Swing that light around in circles. Review it on the back of your camera.
Sometimes you have to move the light very fast with your hand so the color does not get burned out. It’s fun, but exhausting. So better to find settings where you can move at a normal pace—safely—in the dark!
TIPS
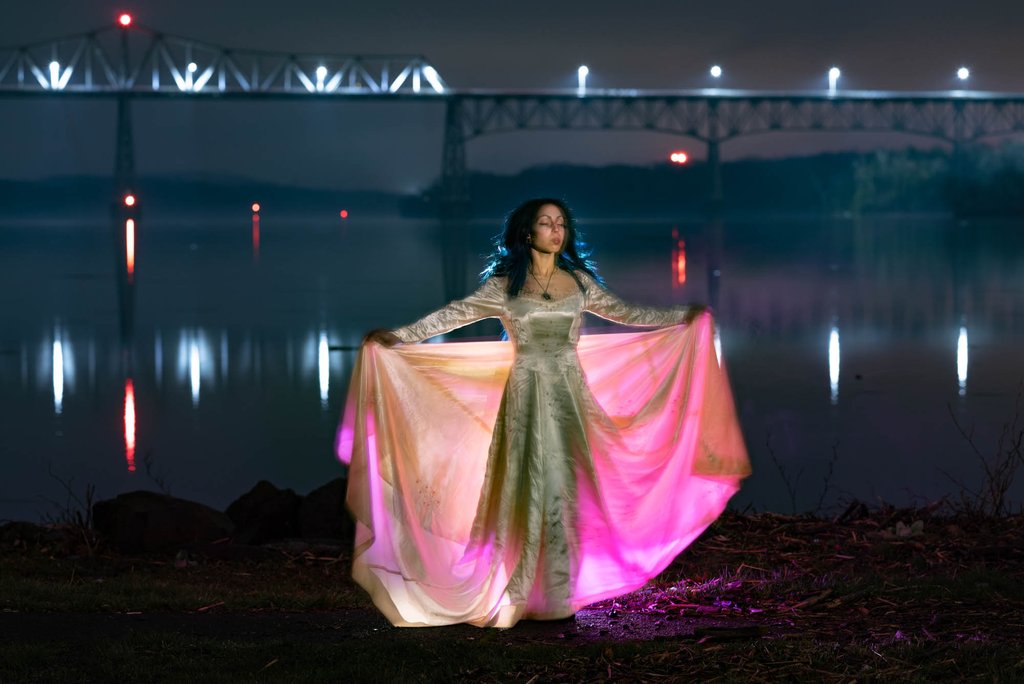
You can take it to the next level by watching the video I collaborated on with Kelly Mena. In this you’ll see how I combined light painting and light writing. And on a variety of surfaces: reflective, textured, textiles and skin.
If you’d like to learn more about night photography, light painting or writing or go on a grand adventure or workshop to learn more in wild spaces and urban places, check out National Parks at Night.
To see more of Matt’s personal work, visit MattHillArt.com.
How to get a proper exposure at night:
ETTR in the Dark: Does ‘Expose to the Right’ Apply at Night? — National Parks at Night
More light painting articles: